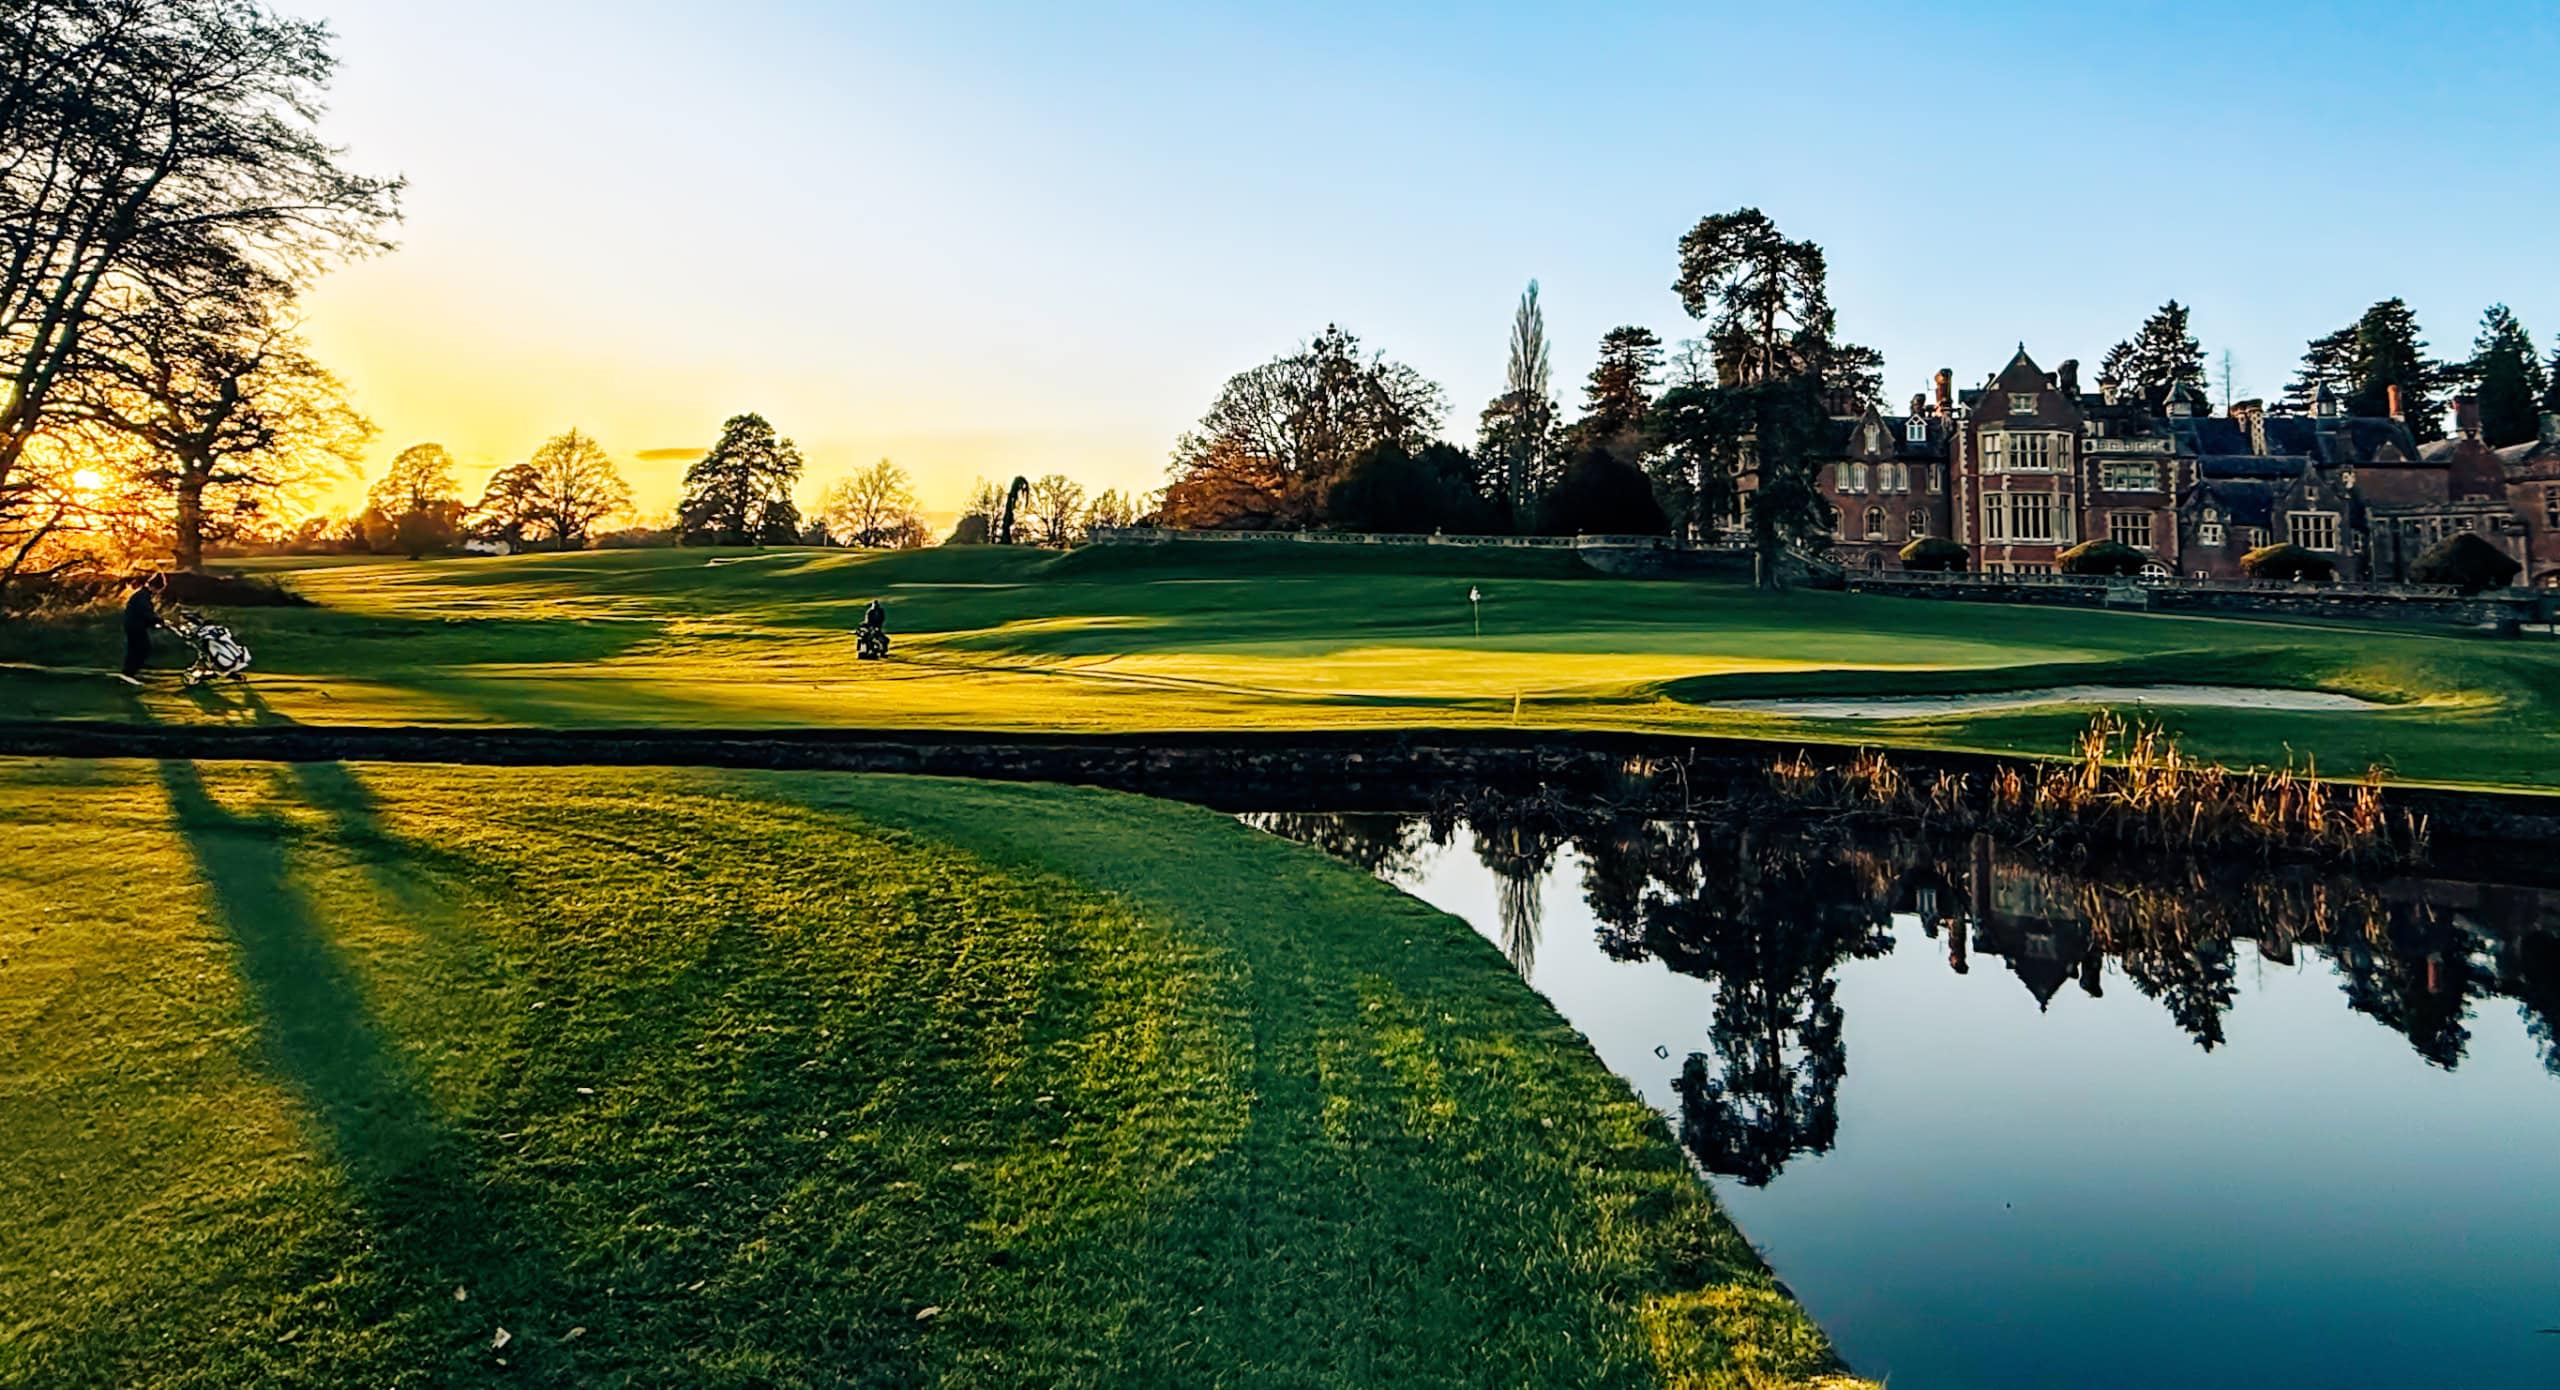
Hole 7 - Dawn o'Day


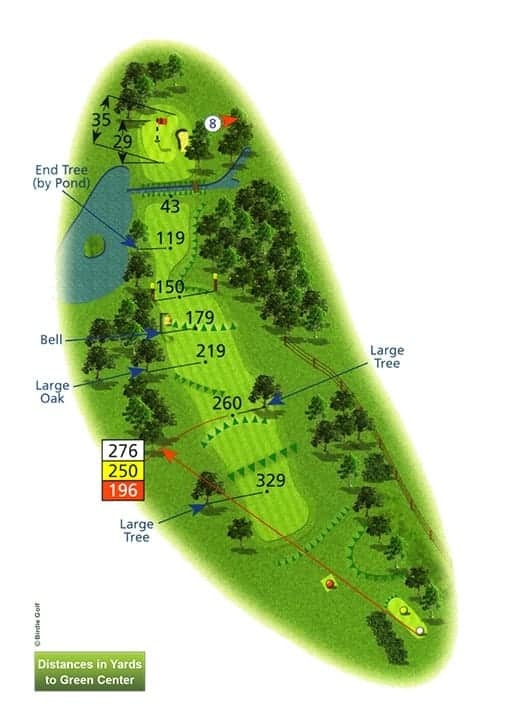
Hole 7 - Dawn o'Day
Tees
Yds
Par
Index
White
536
5
8
Yellow
510
5
8
Red
456
5
6
Pro tip: Favour the right side with your tee shot this should help you get a little extra distance if you catch the slope.
Hole 8 - Gloucester’s Bridge


Hole 8 - Gloucester’s Bridge
Tees
Yds
Par
Index
White
164
3
16
Yellow
163
3
16
Red
135
3
16
Pro tip: Two-tier green so your club selection is important again, get it wrong and you will be lucky to two putt this green. Miss the green left and the toughest bunker shot on the course will await.
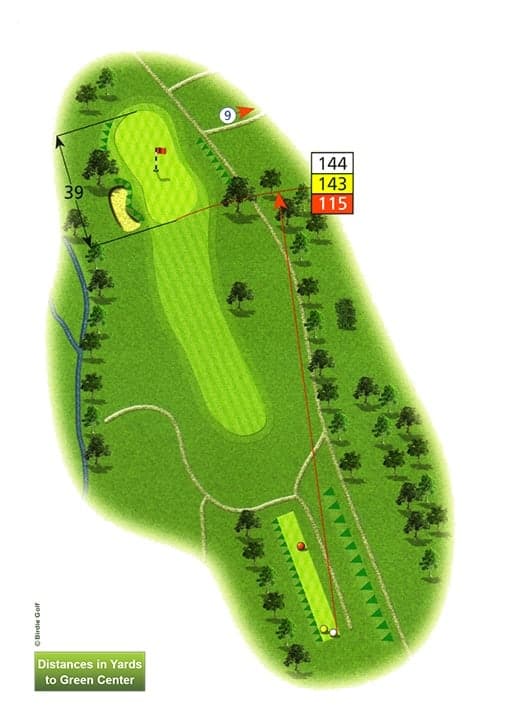
Hole 9 - Rose Garden


Hole 9 - Rose Garden
Tees
Yds
Par
Index
White
343
4
6
Yellow
308
4
6
Red
265
4
8
Pro tip: Be careful with your approach shot, out of bounds is close to the back of the green. You should be happy with a two putt on this green as it’s very undulating.
Hole 10 - Ha! Ha!


Hole 10 - Ha! Ha!
Tees
Yds
Par
Index
White
411
4
9
Yellow
340
4
9
Red
337
4
7
Pro tip: Deceptively long green, be sure to have a good club selection for your approach shot or you could face a long putt. Keep to the right of the fairway for the best angle in to the green.
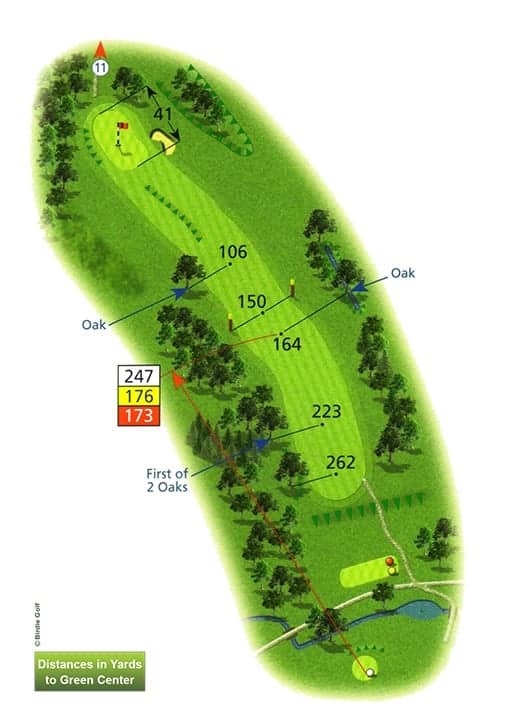
Hole 11 - Panterris


Hole 11 - Panterris
Tees
Yds
Par
Index
White
331
4
17
Yellow
304
4
17
Red
303
4
15
Pro tip: Short par 4 will have the big hitters tempted, however a good tee shot down the middle will leave a simple pitch to the green.
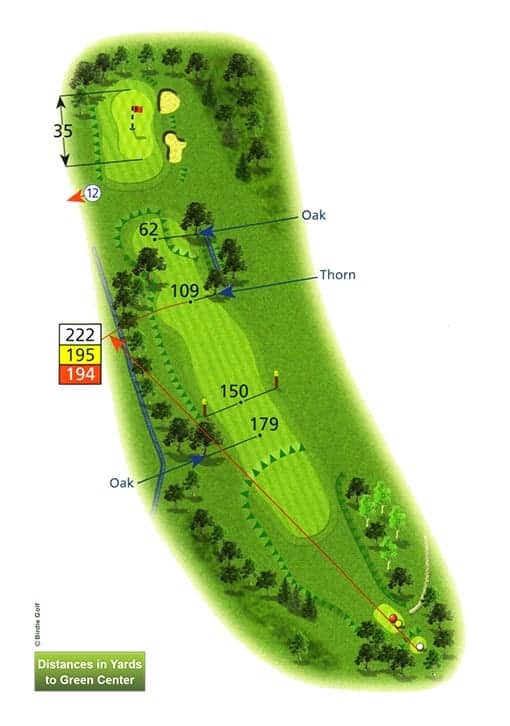
Hole 12 - The Long Drive


Hole 12 - The Long Drive
Tees
Yds
Par
Index
White
534
5
3
Yellow
509
5
3
Red
445
5
3
Pro tip: After a friendly tee shot the hole gets tough, try to avoid the huge oak trees with your second shot. When hitting to the green be sure to miss the bunkers on either side of the green.